Knowing how to configure iPad email settings is important for efficiently managing and receiving your emails. Whether you want to change your email account information, change notification preferences, or customize how you organize your emails, having the right settings can significantly enhance your email experience. This guide explains all the steps required to update your email settings directly on your device, ensuring you can stay connected and organized.
TABLE OF CONTENTS
How To Configure iPad Email Settings
1. Locate and tap Settings on your iPad. This can be found on your home screen or in the app library.
2. Scroll down and select Mail (or Mail, Contacts, Calendars depending on your iOS version). This section allows you to configure all your email settings.
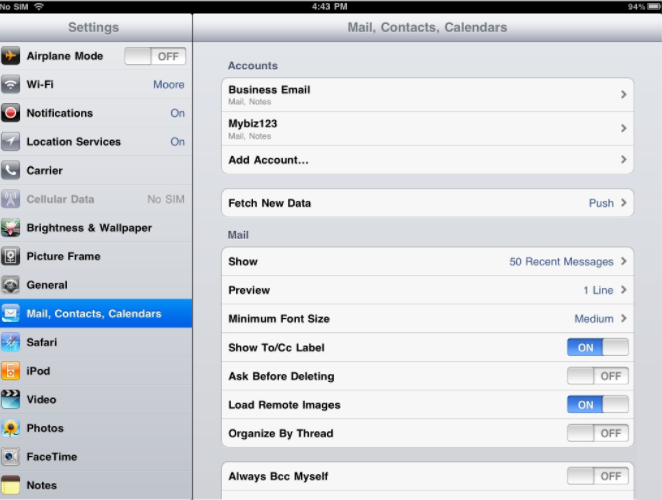
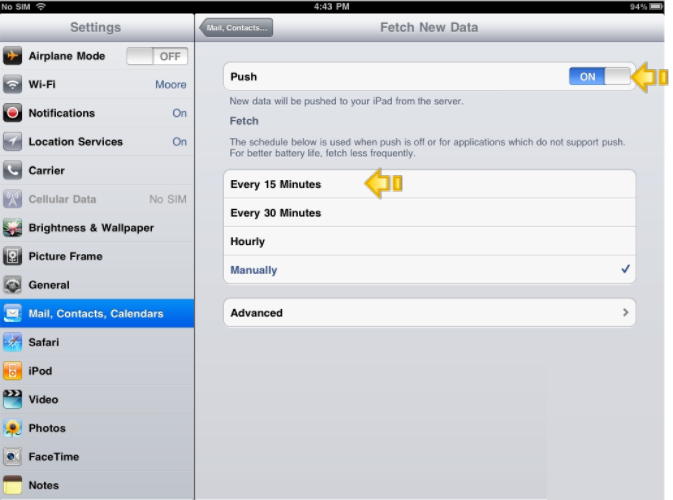
3. Tap on Fetch New Data. If your email service supports Push email, you can enable that feature by turning it on here.
4. Alternatively, you can set your iPad to fetch your email at specific intervals – every 15, 30, or 60 minutes – or manually.
5. Return to the Mail settings screen and tap Show to access further options.
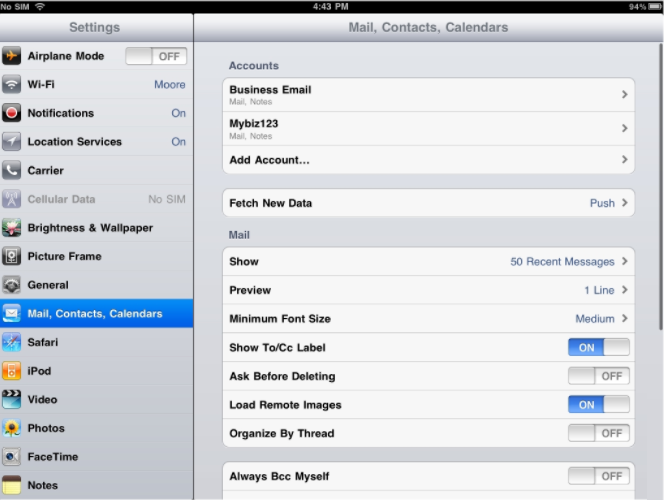
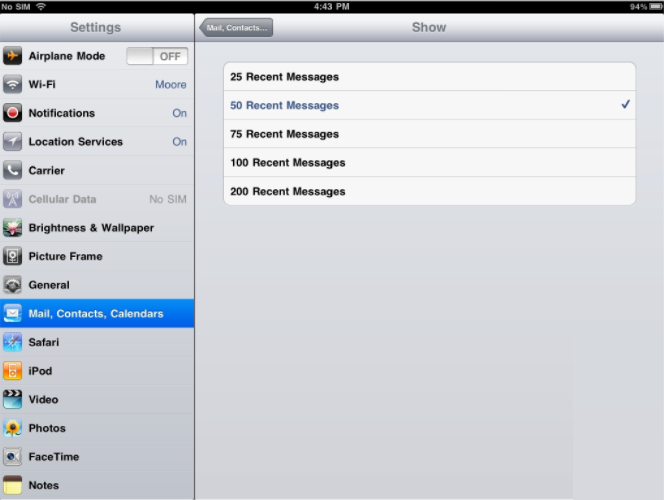
6. From here, you can select how many messages to display in your inbox simultaneously.
7. Decide how many preview lines of each message you want to view in your inbox.
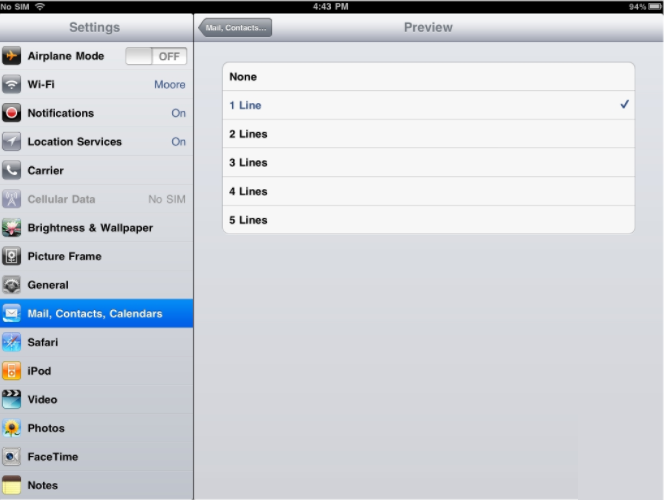
8. You can change the font size to make reading emails easier based on your preference.
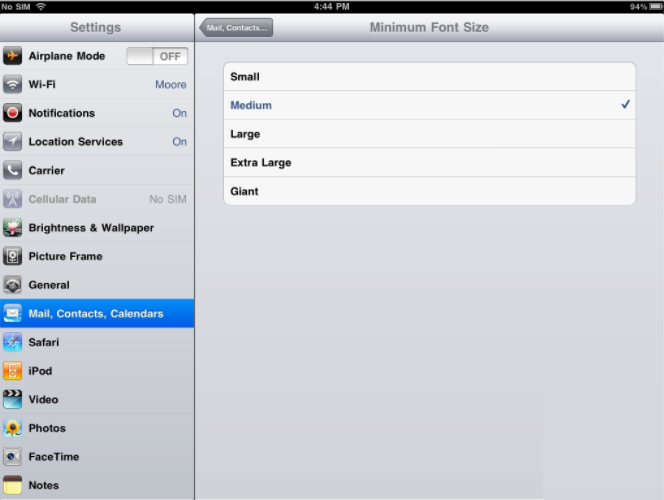
9. Choose whether to display the To and CC labels in your emails or not. You can also enable the Always Bcc Myself option to send a copy of your sent messages to yourself for record-keeping.
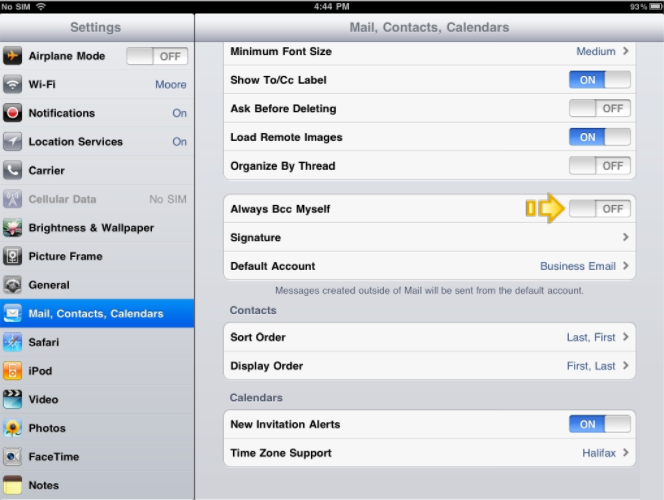
10. Customize your email signature and select which email account will be set as the default if you have multiple accounts configured.
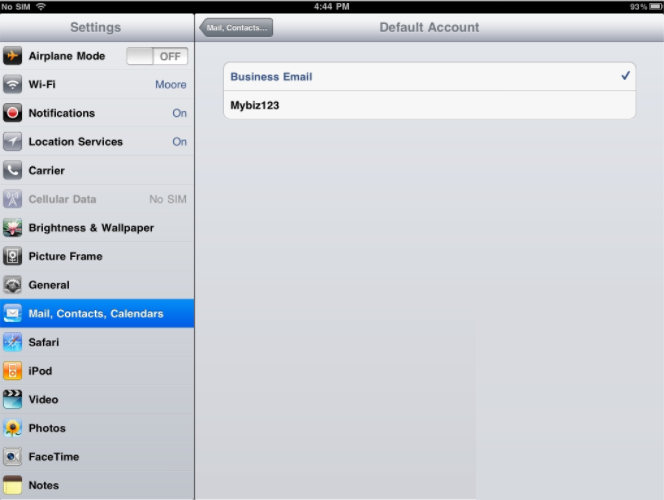
Any setting you wish to change for your iPad email can be adjusted from these screens

That’s it! You now know how to configure your email settings on your iPad.
Additional Information
Why Configure iPad Email Settings
The configuration options in the Mail app on your iPad control how your email accounts are accessed, synchronized, and displayed on your device. Here’s why it’s important to understand iPad email settings:
Choosing the right protocol (either IMAP or POP3 depending on your needs) is essential for how your account is managed and synchronized across devices. Having the right server addresses, login details and port numbers ensures your iPad can connect to your email provider and lets you access your messages.
Organizing and adding new mailboxes helps you keep your inbox tidy so you can find emails easily. Setting up filters (rules) lets you sort and prioritize emails based on sender, subject, or other criteria automatically.
Best Practices
- Regularly Review Settings: It is advisable to periodically review and check your email settings, particularly following software updates or if you have changed service providers or email clients.
- Enable Two-Factor Authentication (2FA): If the option is available, enabling 2FA for your email account enhances security by requiring an additional verification step during login, for example, a one-time PIN sent to your cell phone.
- Synchronize Across Devices: To ensure uniformity, ensure that any changes made after you configure iPad email settings are updated across all devices you use to access this email account.
- Monitor Account Activity: Always make sure you look for any irregular or suspicious activities in your account after implementing changes and promptly report them to your provider.
- Backup Important Emails: It is best practice to back up important emails, attachments, and data before making any major changes to your settings to avoid them being lost unintentionally.


