 Contact Support
 Sign In


This guide explains how to enable a phplist subscription page and embed it into your website. Adding a subscription form to your website allows visitors to join your mailing list quickly and securely. Instead of manually collecting and importing email addresses, a subscription form automatically captures subscriber information and adds it directly to your selected list inside phpList.
This automation improves accuracy, saves time, and ensures that new contacts are properly recorded and managed within your campaign system. When configured correctly, subscription forms help grow your email database organically while supporting responsible data collection practices.
IMPORTANT:
Hosted.com® does not allow the hosting or distribution of mailing lists on our infrastructure. Subscription forms created to collect email addresses for bulk marketing campaigns are also prohibited, as our platform strictly forbids the sending of spam, unsolicited, or mass email from shared hosting environments. These policies are in place to safeguard overall server performance, protect IP reputation, and maintain reliable email deliverability for all clients hosted on our network. If you need to control incoming or outgoing messages, we recommend using email filtering features to whitelist or blacklist specific email addresses or domain names instead of sending bulk communications.
TABLE OF CONTENTS
How to Access Your phpList
1. Login to your Hosted.com® account.
2. Enter your registered email address and password.
3. Click Login.
4. From your dashboard, click the Manage Services dropdown menu.
5. Choose your active hosting plan and click Manage next to your domain.

6. Click Login to cPanel.
7. Scroll to Software.
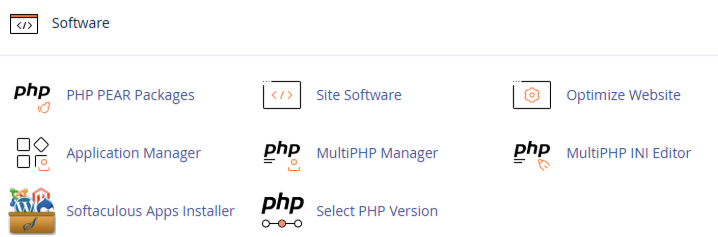
8. Click Softaculous Apps Installer.

9. Locate phpList under your installed applications.
10. Click the Admin URL to access the phpList dashboard.
Enable the Subscription Page
1. In phpList, click Config in the top menu.
2. Select Settings.
3. Locate the Subscription Page option.
4. Ensure the subscription page is enabled.
5. Customize:
- Confirmation email message.
- Welcome email content.
- Required fields.
6. Save changes.
Access phpList via Your Admin URL
yourdomain.co.za/lists/admin1. Click Config and select Settings.
2. Enable the Subscription Page.
3. Customize confirmation messages if required.
Then go to Lists and ensure your mailing list is marked Public. Locate the subscription page link:
yourdomain.com/lists/?p=subscribeYou can either:
- Share the link directly.
Or - Generate embeddable HTML code.
Embed On Your Website
1. Copy the HTML form code.
2. Login to your website admin area (e.g. WordPress dashboard).
3. Paste the code into:
- A page block.
- A widget.
- Or directly into HTML source,
4. Save and publish,
Additional Information
- Your website must have an active SSL certificate installed so that subscription data is transmitted securely via HTTPS encryption, protecting subscriber information from interception.
- Clearly explain what users are signing up for, including email frequency and content type, as transparency builds trust and reduces future unsubscribe rates.
- Double opt-in should be enabled within phpList to require subscribers to confirm their email address before being added to your mailing list, which improves list quality and reduces spam complaints.
- Testing the subscription process end-to-end ensures confirmation emails, welcome messages, and list assignments function correctly before promoting the form publicly.
- Avoid collecting excessive personal information, as longer forms can reduce conversion rates and discourage sign-ups.
- Regularly monitor bounce reports and remove invalid addresses to maintain a healthy sender reputation.
- Subscription forms should never be used to collect or distribute purchased, scraped, or third-party email lists, as this violates hosting policies and can result in blacklisting.
Login to Hosted.com® Account
1. Go to the Hosted.com® website Account Login page.
2. Enter your Email and Password and click the Sign In button.

3. You will see the Hosted.com® Dashboard, displaying the Manage Account menu on the left and your Account Information, Account Overview and Open Support Tickets on the right.

Login to cPanel from your Hosted.com® Dashboard
4. Click on Manage Services to view the sub-dropdown menu and select the hosting package for the domain you want to work with – in our example we are using WordPress Hosting.
5. Click the Manage button to the right of the domain name you want to access.
6. The display will now show Product Information, Quick Manage, Resource Usage and Site Statistics for that domain name.

7. Under Product Information, scroll down to Control Panel, which will display cPanel to the right, and click on the Login button.

8. The cPanel Dashboard will now be displa


